Preparing for a Sailboat Skiing Trip to Svalbard

Preparing for a trip to Svalbard, especially sailboat skiing, requires a bit more thought than a trip to a less exotic location.

Oslo or Stockholm on the Way to Svalbard

First off, you’ll want to be a bit strategic about your travel plans. If you’re coming from Europe, then the time zone changes won’t affect you much, if at all. Traveling from North America presents a bit more of a hassle, but one you can manage with some planning. Think about spending an extra day or two in Oslo or Stockholm — they’re both fantastic cities and you might decide on which to visit based upon your flight to Longyear, the capital town on Svalbard. At the moment, only SAS and Norwegian Air fly to Longyearbyen, so depending upon which airline has a better price or itinerary, you might go through Oslo (if you’re flying Norwegian Air) or Stockholm (if SAS proves a better fit).

Wherever you decide, you might consider an extra day there, to let bags catch up to you if they’re misplaced in transit and/or to spend a day shifting over to a new time zone. The Viking museum in Oslo is supposed to be fantastic (it’s newly renovated), as is the Munsch museum. Stockholm has a million things to do, as well.

oslo harbor svalbard ski trip

Oslo’s harbor, with a beautiful public museum, restaurants, and open spaces

To Longyear

Heading directly to Longyear can be fun, too — it leaves you some extra time to explore and check out other activities, too — like dog mushing, the Polar Museum, the world’s northernmost chocolatier, and more.

Remember, once on Svalbard, it will be 24 hours of daylight in May. A comfortable eye shade makes sense and as with any ski trip, ear plugs are a good idea, too. We work on a fabulous boat — the Noorderlicht — for our sailboat skiing trips, so remember toiletries and a compact towel for showers. A hot shower every evening makes all the difference!

Gear

Each year it seems like a handful of skiers decides to take a cold plunge on one of the last days of the voyage. A swimsuit makes this doable, so remember one if you’re willing to dive into nearly freezing Arctic waters. The science says a cold plunge is good for you, but man … it sure does look … uh, well, cold.

Most guests choose a narrower ski than they might mid-winter, so a 90-ish-millimeter ski works great. It’s typically spring conditions on Svalbard in May, so skin wax helps quite a bit, too. Remember you’ll be ski touring beside the ocean and the humidity can make it feel colder than it is. Sailing in the evenings, too, standing topside can be downright frigid with the wind, humidity, and temps. Bring a good puffy jacket!

The Arctic is warming — it’s an unfortunate reality. Rain becomes a possibility in spring, which is not only a drag for the skiing, but if it refreezes, travel can become tricky. Ski crampons, for this reason, are essential for any ski-and-sail mission to Svalbard.

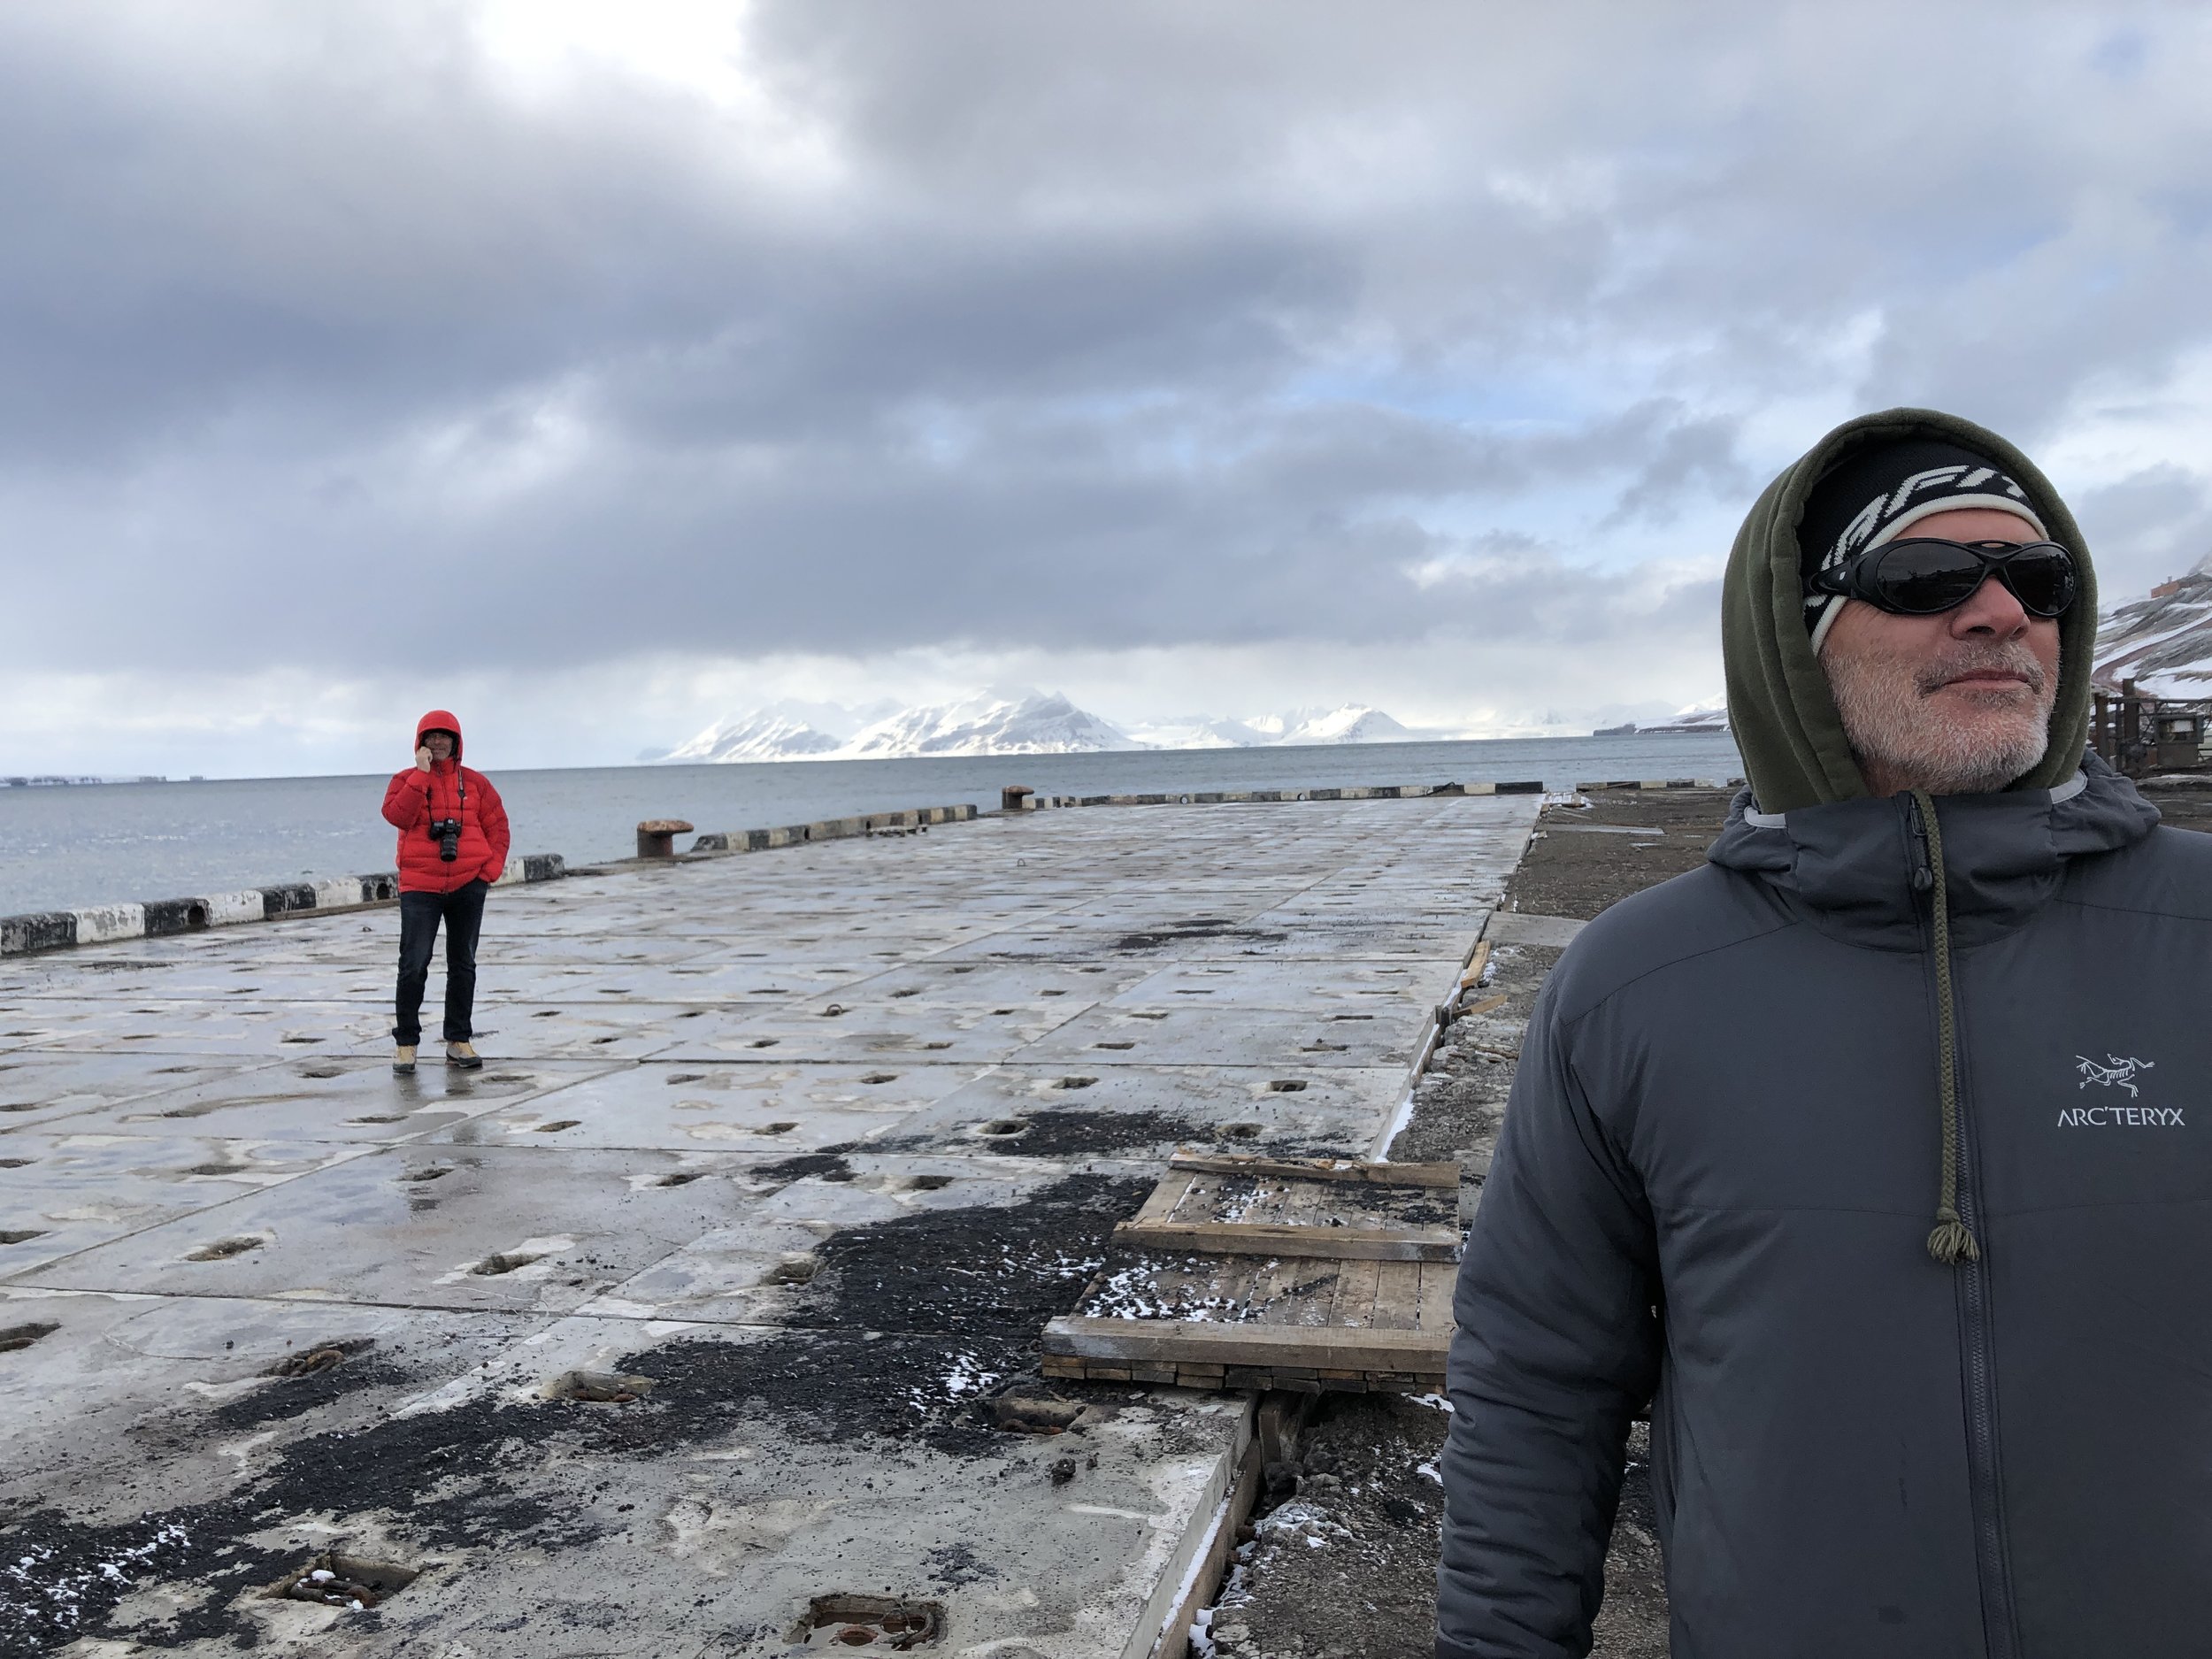
Exploring Barentsburg during a chilly evening, 2019

You’ll need comfortable boat shoes (wool slippers seem to work great) while on board, and some “hang out” clothing, too. Whatever keeps you comfortable at home will work for the boat. The Noorderlicht stays plenty warm, so light sweats, a hoody, anything works.

As always, we’re happy to chat about gear and preparations, so don’t hesitate to reach out. We’re as psyched as you are for a Svalbard trip, so get in touch and we’ll be sailboat skiing together soon!
rock climbing, avalanche education

Potential Failure Mode in the Mountain Guide Manual (and Fixes)

It’s this idea that a pre-rigged device definitively fixes both strands of the rope at the anchor that requires more thought. With most ropes and devices, this seems to work – but aikibujin was monkeying with this technique and decided to test out the scenario in which the first rappeller, still tied into his end of the rope (because he was the leader of the last pitch), descends both strands of the rope, but then accidentally rappels off the unknotted strand. At this point his full weight comes onto the strand to which he’s tied.

avalanche education

Feedback and Kaizen

Research shows incremental changes in behavior are far more sustainable than undertaking massive overhauls in our behavior. Dieting, for example, is way more palatable to most of us if we simply forego sugar in our morning coffee, rather than trying to eliminate it from every aspect of our lives. (Eliminating it entirely would mean avoiding donuts and no human has ever given up donuts successfully. Everybody knows this.)

avalanche education

Don't Deny the Debrief

Ski guiding and avalanche practice present tricky environments for deliberate practice. Too often the feedback we receive isn’t the feedback we ought to receive. We slay deep pow and laugh all the way home—but what if we just missed that trigger point or simply got lucky on the day? Financial investing can be the same; with so many variables in play, often our feedback isn’t “valid;” that is, we simply got lucky rather than being good. In these “low validity” environments it’s critical to debrief the process, as much or more than the outcome.

Virtual Tour of our Boat for Svalbard--the Noorderlicht!

My colleague and great friend, Tom Wolfe, shared a link for a virtual tour of the two-masted schooner we have reserved for our Svalbard Ski & Sail Trip—check it out!

Tom booked the Noorderlicht last year and spent a week exploring fjords and ski peaks on this faraway island, 1000km north of Norway, at nearly 80-degrees north. When he returned to the Svalbard capital, Longyearbyen, he texted me immediately and said, “You’re coming next year, it’s incredible!”

So here we are. Tom and I have the Noorderlicht booked again, May 22-29, 2019. We’ll be in Longyearbyen a few days early ski-touring with guests who’d like to arrive with time to switch over to Norway time before we board the boat. Then we sail north to fjords, long tours, great food, gorgeous scenery, spectacular wildlife, and adventure skiing.

Four spots left until we have a full crew and full boat!

avalanche education

New AIARE Avalanche Courses in Colorado and BC!

Colorado Avalanche Courses: the New AIARE Curriculum

Vetta is happy to be delivering the new recreational curriculum offered by the American Institute for Avalanche Research and Education (AIARE). The split in the old curriculum was long overdue, as it attempted to cater to both aspiring professionals and serious recreationalists alike. In particular, the old “level 2” was problematic, because it tried to cover all the snow science required for professionals, while addressing terrain selection and decision-making relevant for recreationalists, too. It was a tough sell and one that didn’t work particularly well.

The new “rec” curriculum caters directly to avid skiers, splitboarders, snowshoers, and snow-machiners alike. There’s in fact a customized mechanized curriculum, but it shares much of its content with the “regular” rec curriculum. These courses will be known as the AIARE 1 and AIARE 2, and they’re perfect for maintaining sharp skills for backcountry users of all kinds. All incoming avalanche students will take the AIARE 1, then decide if pursuing pro-level education is the right call, or to continue into an 8-hour Companion Rescue course and the AIARE 2.

The AIARE Decision-Making Framework from the “old” curriculum

At first glance, the new curriculum looks substantially different than the old. The “DMF” is now gone and the new fieldbook--the hands-on tool skiers, riders, and sledders have used for more than a decade--is redesigned to match the new rec curriculum. Just a glance at the images of the old DMF and the new fieldbook will give you a hint as to the restructuring of the course.

Veterans of the old system, though, shouldn’t be discouraged--we’re still getting users to the same place! That is, making sound decisions in the backcountry by gathering relevant information, interpreting the avy bulletin and observed info, and maintaining our situational awareness in the field. Grads of the older AIARE 1 might have a hiccup or two adopting the new fieldbook and tools, but in the end, most users will see it’s just a more streamlined, refined, and fluid system with some new tools integrated. But again---it gets us to the same place: safer decisions in the backcountry.

The most exciting aspect of the new rec curriculum is the AIARE 2. It’s designed and customized directly for those wishing to expand and refine their skills, and become trip facilitators and leaders. No, it’s not a guiding tool per se, but it is designed to give a dedicated backcountry user the skills to facilitate expert group decision-making, identify potential problems and biases in one’s backcountry team, and most important---encourages them to use the new tools to “de-bias” and even “pre-bias” the team in an effort to short-circuit human errors and mistakes.

Vetta owner, Rob Coppolillo, is a contributing editor and writer on the new curriculum. He took a fairly refined draft from the AIARE “EdComm” (Education Committee) and AIARE’s Technical Advisor, Colin Zacharias, last spring, proofread it, added where he thought appropriate, and returned it to AIARE’s Recreational Programs coordinator, Liz Riggs-Meder— who passed it to graphic designers with experience in educational curriculum. From there it’s undergone more revision and will be out this fall. Providers across the US will get their first look at it (hopefully) in October sometime. Fingers crossed, because it’s behind schedule; plenty of us thought we’d have a finished product last summer!

The new AIARE 1 and 2 courses will be awesome resources for anyone heading into the backcountry. Rob will be delivering several AIARE 1s in Colorado (Jan. 4-5-6; Jan. 8/10, 12-13; and Feb 19/21, 23-24), as well as an extended-format, hut-based AIARE 2 at Ymir Lodge, outside Nelson, British Columbia, with none other than Colin Zacharias.

Colin is a legendary ski guide in Canada, an internationally certified (IFMGA) mountain guide, and a former snow-safety director at the Calgary and Sochi Olympics. He’s a fantastic educator. He and Rob delivered the first AIARE 2 last winter at Ymir. This year, like last, they’ll spend six days covering the three-day curriculum, and they’ll include a Companion Rescue course, as well. Students will get ample time to apply the new tools, plan tours, and get some awesome turns! For more info, click HERE.


AIARE’s new rec fieldbook offers better flow and integration throughout a team’s prep and touring. The new tool incorporates all the quality techniques from the old curriculum, but builds it into a more logical and fluid tool that helps a team recreate throughout the winter season.

AIARE 2 students gathering snowpack obs above Ymir Lodge, March 2018.

AIARE 2 students gathering snowpack obs above Ymir Lodge, March 2018.

 
AIARE 2 student, Matt Kennedy, gets the goods at Ymir last spring!

AIARE 2 student, Matt Kennedy, gets the goods at Ymir last spring!

C.A.M.P. 2015 Harness Line Reviewed

Though the legendary Italian brand CAMP built its reputation in the US on lightweight gear, the Premana-based company crafts a wide range of gear, from packs to apparel to hard goods. Indeed, some of CAMP’s equipment, like its popular Nano ‘biners, lead the industry in (light) weight, but many of their products compete on comfort, price, and performance regardless of weight. I’ve begun working more closely with the CAMP gang this season and having tried several of their harnesses, I thought I’d give a quick review of the models I’ve worn in the field.

The Blitz
I’ve probably spent more time in the Blitz (7.7 oz.) than any other CAMP harness. It’s great for skiing, alpine routes, and cruisy rock routes. The Blitz definitely leans towards the alpine–it’s unpadded, features a drop seat (meaning you can put it on without taking off crampons or skis), and packs down small. Unlike other anorexic set-ups, it has four gear loops, ice-clipper slots, and features CAMP’s exclusive “No Twist” belay loop. 

The No Twist belay loop distinguishes most of CAMP’s harnesses from every other brand’s–it’s a simple, elegant, lightweight solution to the problem of having one’s belay ‘biner rotate and risk becoming cross-loaded. Rather than rely on clumsy, job-specific carabiners, CAMP users simply slot any carabiner through a narrow, sewn slot in the bar-tacking on the belay loop and voila, the ‘biner is held in its long orientation in the belay loop. Forget heavy, dedicated belay ‘biners.

Another cool feature of the No Twist system is when short-roping while guiding. Slot your favorite locking carabiner, preferably with a wide gate opening, and it’s always oriented correctly on your harness. This allows a guide to build an Italian (Munter) hitch without looking down–a welcome advantage when short-roping one or two guests. One’s eyes can watch the guests, rather than looking down to fumble with a ‘biner. Most of CAMP’s harnesses feature the No Twist and if I’ll be short-roping, I’ll be wearing a CAMP harness, almost without fail–that’s how much I dig the feature, not to mention its safety application for anyone belaying.

CAMP’s No Twist belay loop turns any ‘biner into a dedicated, safer belay ‘biner–clever, simple, and lightweight.

The Blitz is comfortable enough to rappel in and the compressibility and weight savings make it a strong candidate for even long rock routes (Solar Slab in Vegas, Fedele in the Dolomites, the First Flatiron in Boulder), not to mention skimo and alpine routes. My only gripes are typical of lightweight, compressible alpine harnesses: the Blitz tends to fold up after several months of use and the two slots don’t hold an ice clipper as positively as heavier harnesses.

Jasper CR4
I snagged a Jasper CR4 (18 oz.) last year and put in several days on rock with it, before dedicating it to ice/mixed. Why? I ended up preferring another CAMP harness for rock and the ice-clipper slots on the Jasper are crazy stiff–they tend to hold an ice clipper (or “hub-racking ‘biner” as CAMP calls their excellent version) better than CAMP’s other harnesses.

The Jasper CR4 has adjustable legs, as well as dual pre-threaded buckles at the waist, allowing huge adjustability and a centered fit. No matter how many layers you change, you can dial the Jasper’s fit—cool versatility. The gear loops remain open, even when weighted with gear and ‘draws. And the ice-clipper slots function better than any harness I’ve used. It also has the No Twist belay loop.

The weight definitely ticks the heavy end of the scale, but for that you get heavier materials, too, making this a durable choice. I just purchased a couple as rental harnesses for our little guide biz,Vetta Mountain Guides.

Gripes? I really like this harness; it reminds me of BD’s older “Blizzard” model–tough, versatile, good value, but if I had to bitch about something I’d say this rig isn’t quite as comfortable as my favorite CAMP model–the Laser CR.

Laser CR
If I had to pick one harness in which to do everything–the Laser CR (15 oz.) would be it. It’s the most comfortable of the CAMP models I’ve worn, it compresses very well, offers four gear loops, and the No Twist belay loop.

CAMP employs laser-cut nylon, internal padding, and a low-bulk lamination process to fashion the legs and waist. The result is a more pliable and compressible harness, which makes packing it easier than the Jasper models. It’s also more comfortable.

The hub-racking slots aren’t quite as stiff as the Jasper's, but you can certainly ice climb in the Laser. No sweat.

Where the Laser excels is its overall performance—light enough to use backcountry, it’s also comfortable enough for a huge day (think Epinephrine; I loved it!).

Would I prefer it be six ounces lighter? Sure, but guaranteed loss in comfort. The only harness that I’ve worn on par, in terms of comfort, is Edelrid’s awesome Orion. The Laser, though, packs down half the size of the Orion and you get the No Twist loop—absolutely awesome for guiding. Love this thing.

My fave CAMP harness, the Laser CR

Energy
Here’s the surprise harness of this review—if not within the industry this year. CAMP’s Energy (11 oz.)–nearly as comfortable as the Laser CR and get this—50 bucks, retail.

I tried the Energy just to see what the CAMP guys were so jazzed about and I gotta say—this is by far the best “value” harness I know of. Why? Because even thought he price tag says “value,” the comfort is equal to any Arc’teryx harness I’ve worn, it packs flat in your pack, and it climbs just fine. It’s as light as some brands’ alpine harnesses, too. Woh, good job, CAMP crew.

Gripes—one of the ways CAMP must save cash on producing the Energy is deleting the No Twist loop from its feature list. Understandable, but a drag! The only other potential weak spot I see with the Energy is the elastic connecting the rear leg loops to the rear waist—it’s a bit light, so careful in chimneys (again, think Epinephrine!).

Overall, though, I defy anybody to find a better harness at $49.95!

Topaz
I’ve spent the least time in CAMP’s Topaz (14.5 oz.), a one-size-fits-all rig suited to rentals and gyms. That said, it’s pretty comfy (the padding centers itself on the waistbelt, so it’s always dialed on the wearer), has two gear loops, heavy-duty nylon on the leg loops and waist belt, and a single, orange tie-in point. It retails at $60 and adjusts from a 20″ waist to 37″. So far I’ve had clients in it a few days and no complaints.

The Myth of the "AMGA Way"

This blog originally appeared on Elevation Outdoors, June 15, 2012. Rob and Vetta co-founder, Mike Arnold, have since both achieved international certification through the IFMGA. 

Talking to climbers and reading online forums, I consistently hear about the “AMGA way.” A recent post on mountainproject.com got me thinking about this subject (again) and I thought I’d write something on it. For the record, I have taken my beginning rock, alpine, and ski courses, passed my “Single Pitch Instructor” exam (though, come to think of it, I think my cert is lapsed in that discipline–oops!), and I just passed my aspirant exam in ski mountaineering, all through the American Mountain Guides Association–or the mythic AMGA. I’m headed towards my full certification (I hope!) through the International Federation of Mountain Guides Associations (IFMGA; or your “international” cert, basically). I am by no means a representative of the AMGA, any more than a “normal guide” is–I don’t teach for the AMGA, write on its behalf, etc.

Bottom line: though I’d say I’m pretty immersed in the process at this point, this here’s just the opinion of one dude going through the program.

Second bottom line: there is no “AMGA way.” I’ve heard the contrary a lot on courses and at cliffs–“oh, I heard the AMGA way is…” or “hey, what’s the AMGA way?” In doing my courses I’ve run across a couple old-school guides who preferred (quite strongly!) doing things in certain ways, but the vast majority of guide instructors I’ve worked with haven’t had or taught “a way.” There are practices one experiences repeatedly, but I’m trying to think of a course in which one of the instructors or examiners said, “You must do it this way…”

And I can’t.

They hammer certain principles into our heads, though: safety, speed/efficiency, client enjoyment, stuff like that, and in that order. As long as it’s safe, hopefully saves you some time (and doesn’t cost you any!), and your clients are having a blast–party on, brothers and sisters.

My most recent course in Valdez, Alaska, brought this general point home to me when doing my sled-rescue drill. I had been practicing it all winter and when I showed up my examiner, Vince Anderson, said everything looked cool, but he asked me a few questions: why didn’t I just “Munter pop” when doing my knot pass; why not just feed the knot through your Munter; how about setting your releasable hitch on the load strand rather than the brake side?

I don’t want to go fully into the sled-rescue exercise and its details, but my point is Vince was encouraging us to think within the context of skiing and snow, rather than a full-on rock-rescue exercise. We might have way less gear with us during a day of skiing. The potential load forces are generally, but not always, lower than in a rock setting. He said everything I was doing was fine safety wise, but towards efficiency I could improve my exercise.

The over-arching maxim for technical systems within the AMGA, seems to me, is “the right tool at the right time.” This can lead to some frustration, as an examiner might ding a student for using a technique that is arguably not quite appropriate at that particular moment, but the principle also leaves the door open to creative solutions to often complex situations and problems.

Is a single locking carabiner sufficient when clipping in to the rope on a glacier? How about on non-crevassed, but snowy terrain? A two-point anchor in alpine terrain, rather than a full-on three-point equalized rig? How about when a storm’s approaching? Are two locking carabiners “standard” on a toprope system’s master point, or a single non- and single locker?

The above questions might solicit several different solutions and answers, depending on the day, the time, the guide, the climbers, and the situation. Part of the fun and challenge of the AMGA process is filling one’s tool-box with as many techniques as possible, but the real finesse and elegance in guiding is knowing when to pull which one out and put it into practice. Just as important: when NOT to pull out the fancy stuff and let your routefinding, pacing, coaching, modeling, and communication improve safety and the experience.

Again, I am by no means a spokesman for the AMGA and I’m still a ways off of my IFMGA cert, but I spend a lot of time with guides and I’m way down the rabbit hole in terms of courses, so I have some perspective on this “AMGA way.” I don’t think it exists…unless you tack a little “s” on to the end of way…and then you’re on to something. Safe, efficient, and happy climbing!

Kilian Paid Retail for These!

                        Both crampons, 261g

                        Both crampons, 261g

If there’s one name in fast-and-light right now, it’s Kilian Jornet. He’s the Catalan skimo king that, no matter how fast you do anything, will make you feel like a beached whale having a bad day. Point being, Kilian gets what he wants for free, so the fact he paid full retail for the Tech 250 skimo crampon ($110; 261g home verified) means something.

What the…?

German inventor Manfred Quaeck devised the original version of the Tech 250, an abbreviated crampon designed to fit onto any boot with tech inserts in the toe. It’s crafted entirely of thick, laser-cut steel, with two front points, and two full-size points on the sole of the boot, with a petite third point centered between those two.

In short, it’s a lightweight skimo tool used for booting couloirs, scrambling frozen mixy terrain, or any time a full boot crampon is overkill.

Development

Quaeck shopped his initial design around, eventually finding an ally in the capable Martin Volken. Martin is a UIAGM/IFMGA mountain guide based in North Bend, Washington. While he hails from the mountains near Zermatt, he managed to marry a delightful American woman and relocate to the States more than two decades ago. He’s pioneered Cascades classics like the Forbidden Tour, as well as many beyond-burl descents like the North Face of Mount Buckner. Trust me, grab hisexcellent new Cascades guidebook and you’ll see what I mean.

Anyway, Martin helped Quaeck refine the design and now sells the Tech 250 through his retail shop, Pro Ski and Mountain Service. The result? The perfect 261-gram insurance policy for firm snow or a short pitch of water ice.

A quick boot on firm snow is the perfect application for the Tech 250.

A quick boot on firm snow is the perfect application for the Tech 250.

Martin slipped me a pair of these little weapons last fall, so I’ve had several months to monkey with them and with only one or two caveats, I’m saying these belong in your gear closet. I’ve carried these during our low-snow good-stability winter here in Colorado, down at the Opus Hut, up to Rocky Mountain National Park, and even into the Ouray Ice Park. I also took them to Rogers Pass, British Columbia, where they’ve had an unusual winter, too. Point being—perfect testing conditions for the Tech 250.

Light

Yeah, they’re crazy light. 261 grams by my home scale, so I’m guessing the little leashes I installed on the crampons added 10-11g. Nevertheless, this is well over 100g lighter than the lightest aluminum crampon CAMP sells, and you get the durability of steel at the same time. It’s not without a compromise, but I’m betting all you weight weenies out there are already perking up. Read on.

Durable

Martin says there’s an aluminum version in the works, but I’ve not yet seen it or tested it. Whether that comes true or not, the steel version is probably a better bet in Colorado anyway. As the old joke goes, they don’t call them the Rockies for nothing. My experience with aluminum crampons has been that walking/short-roping on rocks quickly bends the center bar, which means it’s permanently fatigued. Replace it with a steel bar, sure, but then it beings to chew up the interface at the Al crampons. Not a huge deal, but it shortens the life of the crampon.

The Tech 250, despite bashing around a bit on rock, kicking it into vertical water ice, and wallowing in some faceted ridgeline snow, has held up like an overbuilt steel ‘pon. The points, indeed, are noticeably thicker than a regular boot crampon, so durability has been fantastic thus far.

Adjustable

Easy installation in minutes

Easy installation in minutes

During installation, you need to customize the front of the 250 to your particular boot. I run Dynafit’s TLT 5/6 98 percent of the time, and part of the reason the boots are so light is the pared down shell. I couldn’t get a perfectly flush fit with the Tech 250 (see pics), but they proved to be perfectly secure, even toproping vertical water ice. I actively tried to lever them off the toe of my boot, without success. Martin reported success with some folks using a Dremel tool to sand out a tiny recess for the Tech 250’s interface, but I did just fine without.

Your set will include washers and instructions to achieve the desired fit. With a more traditional toe shape like a SCARPA Maestrale or Dynafit Vulcan, you should be able to get a perfectly flush fit. It definitely looks nicer and gives better peace of mind, but again—I didn’t experience any problems on a TLT.

Notice the small groove on the TLT’s toe. The Tech 250 doesn’t make perfect contact with the boot, but it proved reliable nonetheless.

Notice the small groove on the TLT’s toe. The Tech 250 doesn’t make perfect contact with the boot, but it proved reliable nonetheless.

Performance

I lowered into the Ouray Ice Park to test ‘em while Micro-Trac’ing and zero stress. I climbed 75 feet of vertical water ice and after two laps, it was equivalent performance to a boot crampon designed for snow climbing. The lack of an aggressive set of second points is somewhat noticeable, but for a short stretch water ice—awesome.

While doing this I tried like hell to get them to shift or lever off. You’ll notice the little “keeper” leash on them to guard against losing them in the case I succeeded. I couldn’t do it and doubt I could even climbing rock (which I also did later). Was I as confident as climbing in a fully auto Blade Runner? No—but at less than 25 percent the weight of the Blade Runner, it’s a compromise worth considering for skimo.

Field installation is a breeze, once you’re accustomed to it. Early versions employed an allen wrench, but Martin lost one in the backcountry and had a voila moment—make it a flathead and you can install/remove these with a quarter, screwdriver, any number of common things you carry ski-touring. Simply remove the crampons from your pack, position them on either side of your boot toe (in the field I was careful to clean the sole of my boot and tech inserts, though our warm winter had me walking in mud more than once–bummer!), then screw in the adjustable nut on one side. Two minutes, top.

Lowering into the ice park at Ouray

Lowering into the ice park at Ouray

For steep, hard snow, they’re great. Frozen, shallow steps in a couloir seem the perfect application for them; they bite like a pissed-off badger and you’re probably not going to get your foot in any deeper anyway, so all you need are the five points.

Once the snow softens and you’re kicking your foot halfway in, you might want a boot crampon, but at that point your boot pen is so good, I’m betting most of you will forego a crampon altogether. Maybe?

Climbing/scrambling on rock yielded similar results. Solid performance, though at this point, when standing on a larger rock or slab, the raised toe was noticeable. Without spikes on the mid- and rear-foot, your toe sits pretty high. I can’t imagine most folks will be climbing long stretches of rock in these, so slow down, realize your footing will feel off-kilter, and SEND!

Portage

One of the things I like about the Tech 250 is its packability. With a little jostling you can nest them within your ski crampons, no problem. Carried on their own, I lined a small stuffsack with duct tape and made a dedicated bag. In any event, they take up almost no space in your pack, though I warn you: they’re sharp. You gotta have them stashed in a reinforced stuffsack, or you’re going to shred your pack’s interior!

Duct tape, an old stuff sack, and you’re all set.

If you know you’re headed into a bulletproof bootpack, then a small stuffsack dangling from the waist is a slick way to carry them. You could even get them in a pocket, if need be. Be careful, though, you don’t want to puncture your junk.

Caveats

One of the few situations in which I found the Tech 250 noticeably inferior to a full boot crampon was in descending pied a plat, or in flat-footed “French” technique. With the foot flat, you’re missing at least six or eight other spikes, so it feels much less secure. If the snow is firm, you can simply turn around and face in, but keep it in mind before you start dropping vert.

I’d also hesitate to short-rope guests wearing the Tech 250. My thinking is that if I’m short-roping, I need to have the ability to face out, flat-foot, etc. Not a consideration for most people, but it occurred to me.

‘Tis the Season

Skimo season is upon us. Even though Washington, California, Colorado, and even much of Canada has had a bizarre, below-average winter, there’s still fun and rowdy skimo ready to go. The Tech 250 is the perfect addition to your gear quiver, I think. Sounds like Washington requires a hike in the valley no matter what, to get the goods, and Colorado’s heading that way—so why lug your boot crampons when you can bring along the 250 and get similar performance?

Though Martin provided my set free, I’d pay the $110 for the Tech 250. It lightens your pack and almost as important, it saves space. I love the things…and so does Kilian. Forty pounds of liposuction later, maybe I’ll be just as fast? Wish me luck.

Big Agnes Horse Thief 35--Light, Warm Comfy

Jargon, marketing, diagrams…it’s all for naught if you don’t get a good night’s rest. I thought twice before packing a Big Agnes Horse Thief 35 (852g; 1.8 lb.; $370) for a couple nights on Mount Shuksan. Despite having 800-fill down, the Horse Thief–like all of Big Agnes’s bags–has no insulation in the bottom of the bag. Makes sense on paper…but in the field, on my advanced alpine course…was this a good idea?

Turns out it was a great idea! My only gripe was not trying to score an even lighter model from Big Agnes…but hey, there’s always next year, right?

I’ve known of Big Agnes products for years, but just haven’t gotten around to trying ‘em. The idea that put ‘em on the map, not using insulation beneath the sleeper, seemed logical to me. You crush your insulation, particularly down, and it quits working…so why use it? Good question. To keep the sleeper warm, Big Agnes bags feature a sleeve along the bottom into which a sleeping pad slides. You’re literally locked onto the top of the pad, meaning you’ll never slide off of it and onto the cold ground. Second good idea.

More than a decade later and I’ve tried it out. Makes me want to sell my other bags and convert ‘em all to Big Agnes. I mean, seriously–why are all these other manufacturers stuffing the underside of their bags with expensive (and ultimately useless) goose down and synthetics? You’re better off with a quality pad beneath you and putting some of your insulation across your top.

The Horse Thief falls into Big Agnes’s “Divide Superlight” category. No hood, 800-fill down, Pertex Quantum shell fabric. I still found it roomy enough in the shoulders (I’m 5’10”, wear a 41R suit jacket, 165 lbs.) and I begged for a long model, so I’d have room to dry socks in the bottom. They call it a “mummy” bag, but it sleeps more like a rectangular rig. Mission accomplished and I dozed like a baby.

BA builds these bags with more vertical channels/chambers for the insulation, rather than horizontal. They call it "Insotect" construction, but whatever the case, it's plenty warm. I slept in my skivvies several nights in the Cascades, into the 40s and I was just fine in the Horse Thief. I'd have liked to try the next bag up, the Pitchpine 45, a lighter, quilted-construction model. Next time. 

I like the pillow pocket on the Horse Thief, too–just a thin, nylon pouch that’s sewn into the head of the bag. I stuffed my pants and baselayer into it and slept like a baby. The sleeve might add a few grams at the most; simply done, unobtrusive, and workable.

Big Agnes also sent me their “Air Core SL” pad to use and the thing is comfortable and warm–BUT, it’s heavy (561g; 1 lb. 4 oz.). So much so, I took my NeoAir (371g; 13 oz.) on my alpine course, rather than the BA pad. In fairness, it’s almost twice as thick as the NeoAir, but still…alpine climbing and the long walk into Shuksan…no dice. Backpacking, I’d probably lug the BA model, but it’s simply too chubby for climbing. The loft/height is impressive, so I imagine it’s warmer than most others (though I’ve heard too much height/airspace leads to conductive cooling).

So in summary–so far, so very good. I just pulled out the bag to shoot some expert (read: lame iPhone) photos and discovered there is a bit of down in the bottom/ground-side of the bag. I was under the impression there is none at all, but it seems there’s a bit. Why? That’s about my only question mark, though. All in all, the Big Agnes bag delivers on its word.

As for the pad–slim it down to NeoAir dimensions and I wonder if it’d be just as comfortable, but more durable than the competition. The shell material seems a little tougher than the NeoAir, so I’d love to see a lighter version and give it a fair comparison. Beyond that, though, I’m impressed with the Steamboat Springs-based company’s product. Love to try a heavier set up down the road. Maybe for my ski exam in February?

Fast & Light: HMG's Summit Pack

Wearing the Hyperlite Mountain Gear "Summit Pack" on my Alpine Guide Exam, September 2014. Mike Arnold, in the background, is wearing the slightly lighter version, the all-white model built of a lighter Cuben fabric. Great packs...and we both passed…

Wearing the Hyperlite Mountain Gear "Summit Pack" on my Alpine Guide Exam, September 2014. Mike Arnold, in the background, is wearing the slightly lighter version, the all-white model built of a lighter Cuben fabric. Great packs...and we both passed the exam!

Despite an above-average snowpack, some of us are already tying in and getting some pitches. With my rock exam looming next week, I’ve tried to be diligent and get outside when I can or at least hit the rock gym. Colorado managed to put together a pretty good winter and it continues to snow–it’s nuking as I type this–so I booked a few days in Red Rocks with a co-candidate on the exam and a Tucson-based buddy. I love climbing in Vegas, but it also made the perfect proving ground to hammer Hyperlite Mountain Gear‘s 30L “Summit Pack” ($170; 402g, 14 oz.).

HMG crafts packs, shelters, and accessories out of “Cuben,” a tough-and-waterproof fabric that’s used in high-end sails. Cuben sandwiches Dyneema filaments between polyester film, in terms dumbed down for guys like me. It’s a bit stiffer and “louder” than nylon packcloth…in addition to being four times stronger than Kevlar, chemical resistant, UV resistant, and waterproof. The Summit comes in 150d weight, while the Ice Pack saved some tonnage by using the 50d fabric. The Summit does seem noticeably more durable, as I hauled, thrashed, chimneyed, and bombed the daylights out of the thing…and it’s still hanging tough.

The worst of the damage inflicted over the course of two weeks of climbing, the last of which was in Red Rocks.

The worst of the damage inflicted over the course of two weeks of climbing, the last of which was in Red Rocks.

That’s not to say I didn’t damage it; I did. Having nuked several plain nylon bullet packs, my impression is the Cuben does just fine, though with a price tag of $170, you’ll want to baby the thing if possible. I hauled it (filled with two liters of water, rock shoes, a puffy, food, etc.) on the chimney pitches of Red Rocks’ Epinephrine, scruffed through plenty of oak scrub, and tunneled through endless boulders while approaching and descending climbs. I’m headed back to Vegas and plan to do my entire exam with the thing. It’s nearly perfect.

The Summit’s dimensions swallow approach shoes stacked against one another. With careful packing you can stack water bottles/heavy stuff along the back and lightweight gear (puffy jackets, etc.) on the outside, making the pack ride really well when …

The Summit’s dimensions swallow approach shoes stacked against one another. With careful packing you can stack water bottles/heavy stuff along the back and lightweight gear (puffy jackets, etc.) on the outside, making the pack ride really well when climbing.

Fully extended, or unrolled, the Summit holds 30+ liters. I routinely carried a light puffy, a hard shell, two liters of water, food for the day, harness, rock shoes, and a helmet inside. I’d drape a 60m cord over the top, feeding the loops of the rope through my arm straps to secure it. We had rain one day in the desert, so I quickly dumped the pack, piled the rope in the bottom, stuffed the rest on top and bumped the helmet to the outside–no problem. The Cuben fabric shed water easily and the rolltop design swallowed up plenty of gear.

The waist belt (3/4″ flat webbing) is nonexistent in terms of transferring weight to one’s waist–but it does stabilize the pack when climbing. Shoulder straps are unpadded, just plain fabric, which I appreciated. They’re cut well and with 15-20 pounds, they didn’t cut of chafe my shoulders. Another advantage of the minimalist design is the packability. When the Summit arrived in the mail, I didn’t think there was a backpack inside. The package was more like a padded envelope containing a small paperback. Point is, you could easily stow the Summit in a 40L pack on an approach and then climb with it backcountry (already thinking towards my alpine exam).

The back panel sports two daisies, through which I lashed a section of 5mm shock cord–it functions as my helmet holder on an approach, then I rethread it through a couple lash points to hold a jacket if needed. The rolltop functions as the compression, so when I had just a jacket, shoes, water, and food in it, it easily rolled down to 10-15L, without shifting or flopping around.

Improvised helmet carrier and the rolltop fully extended. Ample storage!

Improvised helmet carrier and the rolltop fully extended. Ample storage!

It’s the best bullet/summit pack I’ve ever used, but I realize the $170 is a chunk of dough. I’d say skip a couple meals out, a night at the bars…and pick up a Summit. Save it for your big days and backcountry missions. It’s winter-summer versatile, plenty tough, waterproof, and wears well, whether overstuffed or barely filled. Another score for the HMG crew. Good job.

Please check out another post on Hyperlite Mountain Gear's excellent "Ice Pack"--HERE, on Elevation Outdoors. 

This post originally appeared, in 2014, on Elevation Outdoors--thanks to my friends over there for the good work! 

The Kong Gigi--a Guide's Best Friend

Ever been climbing as a group of three and by day’s end your elbows are wreckage from pulling ropes through your belay device? Yes, well, there is salvation for you and your aching elbows…the Kong “GiGi.” The GiGi is an Italian-made belay device that’s mostly used for belaying your follower(s) in “autoblock” mode. Ropes tend to pull through the slots on the GiGi much more easily than a Petzl Reverso or Black Diamond ATC Guide–but like most techniques and tools there are compromises for the easier pulling…so read on.

The lightweight and easy-on-the-elbows Kong Gigi

The lightweight and easy-on-the-elbows Kong Gigi

Kong has an informative page on their site detailing all of the GiGi’s proper applications and techniques, but I wanted to write something specific about the Kong because I’ve used the the thing incorrectly on occasion. More on this in a sec…

Like I said before, the GiGi’s main advantage over the Reverso and ATC Guide is ease of use. For guides, who might be pulling hundreds of meters of rope a day, day in and day out, this can mean the difference between tendinitis and smooth sailing. The GiGi has wider, longer slots than other autoblocking devices (an autoblocking device locks up when a follower falls, introducing security into the system, as well as allowing the belayer to be tending to other tasks like eating, stacking the rope, checking the route topo, etc.) which allows rope to feed more smoothly and more easily–cool.

The downside, though, is that these wider, longer slots can let a thinner rope (less than 10mm in diameter, as indicated in the Kong literature) twist, invert, and come out of autoblock mode if the blocking biner isn’t oriented properly.

As with the Reverso and ATC Guide, the follower’s strand of rope (or the “load” strand”) is on top in this pic. Unlike the Reverso and ATC Guide, though, when using a rope of less than 10mm in diameter, it is not enough to simply clip the rope in th…

As with the Reverso and ATC Guide, the follower’s strand of rope (or the “load” strand”) is on top in this pic. Unlike the Reverso and ATC Guide, though, when using a rope of less than 10mm in diameter, it is not enough to simply clip the rope in the back with a block biner–as is pictured here. This photo, therefore, is of a GiGi set up INCORRECTLY when belaying a single rope of less than 10mm.

Notice in the above photo that the GiGi is set up exactly as one would belay a single rope with a Reverso or ATC Guide. While this works flawlessly with either of those tools, the GiGi is not designed to belay a single strand of less than 10mm rope in this fashion. Why?

To see why the GiGi isn’t meant to be used this way, simply weight the load strand, then twist the blocking biner forcefully in either direction by rotating it in one’s hand.

To see why the GiGi isn’t meant to be used this way, simply weight the load strand, then twist the blocking biner forcefully in either direction by rotating it in one’s hand.

As you rotate the biner, you’re essentially taking the climber’s (or load) strand and flipping it to the bottom. Because of the wider slots on the GiGi, with a rope of less than 10mm in diameter, it is possible to flip the climber’s strand to the bo…

As you rotate the biner, you’re essentially taking the climber’s (or load) strand and flipping it to the bottom. Because of the wider slots on the GiGi, with a rope of less than 10mm in diameter, it is possible to flip the climber’s strand to the bottom and the GiGi is no longer in belay mode and will fail.

The ropes have now been flipped, so the climber’s strand is on the right in this photo, which is also the bottom–INCORRECT on the GiGi as well as the Reverso and ATC Guide. The belay device will fail at this point. To be clear: this is not a design …

The ropes have now been flipped, so the climber’s strand is on the right in this photo, which is also the bottom–INCORRECT on the GiGi as well as the Reverso and ATC Guide. The belay device will fail at this point. To be clear: this is not a design flaw in the GiGi. Rather, it is user error, but perhaps a common one because the Reverso and ATC Guide are virtually impossible to flip while the GiGi can with a skinny, single rope.

Before you write the GiGi off, there is an easy fix for the above error. As described in the GiGi manual, you simply orient your blocking biner around the whole device (pics to follow) when using a rope of less than 10mm in diameter (which everybody seems to these days!). I generally only use my GiGi when belaying two strands of rope from above, which makes the potential error described above a moot point–with two strands of rope, it’s impossible to twist the blocking biner around and release them. Even with a single strand, the likelihood is fairly low, but it is potentially a catastrophic mistake.

Below is a quick video illustrating what can happen: 

So, not to worry, the fix is easy–simple orient the blocking biner around the entire device when belaying a single strand of rope. You just rendered the whole “rope-flipping” thing a moot point–good work! The GiGi manual describes this situation clearly, but I’ve seen the GiGi used this way a few times and an IFMGA guide emailed me to clarify the technique. He had a near-miss early in his guiding career and took the time to send me some video showing the GiGi release when set up incorrectly–and I want to reiterate that this situation is not a design flaw in the GiGi–it’s simply using the tool incorrectly.


The simple fix: if belaying a single follower/strand of rope of less than 10mm, orient your blocking biner around the entire device, so it can’t rotate and flip the ropes into an “unbelayed” or “non-autoblocked” orientation. Easy!

The simple fix: if belaying a single follower/strand of rope of less than 10mm, orient your blocking biner around the entire device, so it can’t rotate and flip the ropes into an “unbelayed” or “non-autoblocked” orientation. Easy!

If you’re using the GiGi with two rope strands, no sweat, but if you choose to use it on a single strand when belaying your second/a follower, then make sure you orient your blocking biner around the entire unit and you’re good to go. I like my GiGi because it feeds rope smoothly (on rappel, too) and despite what people say, it can belay a leader when used correctly and by a skilled practitioner. But again–visit the manual and verify that you’ve been using it correctly! It’s a great tool, but one that requires a bit more management than a Reverso or ATC Guide.

Apologies if I’ve been redundant or a bit pedantic, but I wanted to clarify this issue with the GiGi–I’m sure I’ve set the thing up incorrectly at some point in the past…and while the likelihood of twisting the rope and releasing it (as shown above) seems pretty low, I’ll make sure to always orient my blocking biner around the GiGi so it can’t flip.

I’m a big fan of the GiGi, and maybe it’s worth introducing to your toolbox…but make sure you’re using it correctly–I am now. Thanks to the guide who took to the time to email me and happy climbing to all of you.

This post originally appeared on Elevation OutdoorsThanks for the team over there for the good work!